前言
CloudFlare free temp domain email 免费收发 临时域名邮箱 支持附件 IMAP SMTP TelegramBot 项目地址 官网及wiki
前提
- cloudflare账号
- github账号
- 已安装wrangler和git
- 最好在cloudflare中托管有域名
Wrangler是一个由 Cloudflare 提供的工具,主要用于管理和部署 Cloudflare Workers(一个无服务器计算平台)
部署过程
安装wrangler和git项目到本地
npm install wrangler -g
git clone https://github.com/dreamhunter2333/cloudflare_temp_email.git
# 切换到最新 tag 或者你想部署的分支,你也可以直接使用 main 分支
# git checkout $(git describe --tags $(git rev-list --tags --max-count=1))
D1数据库
创建D1,设置:
cd worker
# 打开git到本地的项目worker地址
cp wrangler.toml.template wrangler.toml
# 创建 D1 并执行 schema.sql
wrangler d1 create dev
wrangler d1 execute dev --file=../db/schema.sql --remote
具体过程:
C:\Users\ro264\cloudflare_temp_email>cd worker

C:\Users\ro264\cloudflare_temp_email\worker>copy wrangler.toml.template wrangler.toml
已复制         1 个文件。

C:\Users\ro264\cloudflare_temp_email\worker>wrangler d1 create dev

 ⛅️ wrangler 3.87.0
-------------------

✅ Successfully created DB 'dev' in region WNAM
Created your new D1 database.

[[d1_databases]]
binding = "DB"
database_name = "dev"
database_id = "3529---------------------acc1"


C:\Users\ro264\cloudflare_temp_email\worker>wrangler d1 execute dev --file=../db/schema.sql --remote

 ⛅️ wrangler 3.87.0
-------------------

√ ⚠️ This process may take some time, during which your D1 database will be unavailable to serve queries.
  Ok to proceed? ... yes
🌀 Executing on remote database dev (3529d7ec-fb9f-446d-8e32-3875bb80acc1):
🌀 To execute on your local development database, remove the --remote flag from your wrangler command.
Note: if the execution fails to complete, your DB will return to its original state and you can safely retry.
├ 🌀 Uploading 3529d7ec-fb9f-446d-8e32-3875bb80acc1.e4cb45410cf599cc.sql
│ 🌀 Uploading complete.
│
🌀 Starting import...
🌀 Processed 21 queries.
🚣 Executed 21 queries in 0.00 seconds (33 rows read, 40 rows written)
   Database is currently at bookmark 00000000-0000000b-00004e4b-4ec------------------9ead90d2.
┌────────────────────────┬───────────┬──────────────┬────────────────────┐
│ Total queries executed │ Rows read │ Rows written │ Database size (MB) │
├────────────────────────┼───────────┼──────────────┼────────────────────┤
│ 21                     │ 33        │ 40           │ 0.14               │
└────────────────────────┴───────────┴──────────────┴────────────────────┘
更新数据库 schema:
cd worker
wrangler d1 execute dev --file=../db/2024-08-10-patch.sql --remote
具体过程:
C:\Users\ro264\cloudflare_temp_email\worker>wrangler d1 execute dev --file=../db/2024-08-10-patch.sql --remote

 ⛅️ wrangler 3.87.0
-------------------

√ ⚠️ This process may take some time, during which your D1 database will be unavailable to serve queries.
  Ok to proceed? ... yes
🌀 Executing on remote database dev (3529d------------------80acc1):
🌀 To execute on your local development database, remove the --remote flag from your wrangler command.
Note: if the execution fails to complete, your DB will return to its original state and you can safely retry.
├ 🌀 Uploading 3529d7ec-fb9f-------------------------40827ec6a08e29b4.sql
│ 🌀 Uploading complete.
│
🌀 Starting import...
🌀 Processed 3 queries.
🚣 Executed 3 queries in 0.00 seconds (0 rows read, 0 rows written)
   Database is currently at bookmark 00000001-00000004-00004e4b-baa824--------------edde1d3991ae.
┌────────────────────────┬───────────┬──────────────┬────────────────────┐
│ Total queries executed │ Rows read │ Rows written │ Database size (MB) │
├────────────────────────┼───────────┼──────────────┼────────────────────┤
│ 3                      │ 0         │ 0            │ 0.14               │
└────────────────────────┴───────────┴──────────────┴────────────────────┘

C:\Users\ro264\cloudflare_temp_email\worker>
Cloudflare workers后端
初始化项目
cd worker
npm install -g pnpm
pnpm config set registry https://registry.npmmirror.com
# 淘宝 NPM 镜像服务在中国大陆通常更稳定,临时切换到淘宝镜像
pnpm install
cp wrangler.toml.template wrangler.toml
具体过程:
C:\Users\ro264\cloudflare_temp_email\worker>npm install -g pnpm

added 1 package in 20s

1 package is looking for funding
  run `npm fund` for details

C:\Users\ro264\cloudflare_temp_email\worker>pnpm config set registry https://registry.npmmirror.com

C:\Users\ro264\cloudflare_temp_email\worker>pnpm install
Lockfile is up to date, resolution step is skipped
Packages: +389
++++++++++++++++++++++++++++++++++++++++++++++++++++++++++++++++++++++++++++++++++++++++++++++++++++++++++++++++++++++
Downloading [email protected]: 5.83 MB/5.83 MB, done
Downloading @cloudflare/[email protected]: 35.21 MB/35.21 MB, done
Progress: resolved 389, reused 288, downloaded 101, added 102, done
node_modules/.pnpm/[email protected]/node_modules/core-js-pure: Running postinstall script, done in 149ms
node_modules/.pnpm/[email protected]/node_modules/esbuild: Running postinstall script, done in 627ms
node_modules/.pnpm/[email protected]/node_modules/workerd: Running postinstall script, done in 784ms

dependencies:
+ @aws-sdk/client-s3 3.687.0
+ @aws-sdk/s3-request-presigner 3.687.0
+ @simplewebauthn/server 10.0.1
+ hono 4.6.9
+ mimetext 3.0.24
+ postal-mime 2.3.2
+ resend 3.5.0
+ telegraf 4.16.3

devDependencies:
+ @cloudflare/workers-types 4.20241106.0
+ @eslint/js 8.56.0
+ @simplewebauthn/types 10.0.0
+ eslint 8.56.0
+ globals 15.12.0
+ typescript-eslint 7.18.0
+ wrangler 3.85.0

Done in 11.7s

C:\Users\ro264\cloudflare_temp_email\worker>copy wrangler.toml.template wrangler.toml
覆盖 wrangler.toml 吗? (Yes/No/All): yes
已复制         1 个文件。
创建 KV 缓存
wrangler kv:namespace create DEV
具体过程:
C:\Users\ro264\cloudflare_temp_email\worker>wrangler kv:namespace create DEV

 ⛅️ wrangler 3.87.0
-------------------

🌀 Creating namespace with title "cloudflare_temp_email-DEV"
√ Would you like to help improve Wrangler by sending usage metrics to Cloudflare? ... yes
Your choice has been saved in the following file: ..\..\AppData\Roaming\xdg.config\.wrangler\metrics.json.

  You can override the user level setting for a project in `wrangler.toml`:

   - to disable sending metrics for a project: `send_metrics = false`
   - to enable sending metrics for a project: `send_metrics = true`
✨ Success!
Add the following to your configuration file in your kv_namespaces array:
[[kv_namespaces]]
binding = "DEV"
id = "7498d4---------------------1b4"
修改 wrangler.toml 配置文件
name = "cloudflare_temp_email"
main = "src/worker.ts"
compatibility_date = "2024-09-23"
compatibility_flags = [ "nodejs_compat" ]

# 如果你想使用自定义域名,你需要添加 routes 配置
# routes = [
#  { pattern = "temp-email-api.xxxxx.xyz", custom_domain = true },
# ]
node_compat = true

# 如果你想要使用定时任务清理邮件,取消下面的注释,并修改 cron 表达式
# [triggers]
# crons = [ "0 0 * * *" ]

# 通过 Cloudflare 发送邮件
# send_email = [
#    { name = "SEND_MAIL" },
# ]

[vars]
# TITLE = "Custom Title" # 自定义网站标题
PREFIX = "tmp" # 要处理的邮箱名称前缀,不需要后缀可配置为空字符串
# (min, max) adderss的长度,如果不设置,默认为(1, 30)
# ANNOUNCEMENT = "Custom Announcement" # 自定义公告
# address name 的正则表达式, 只用于检查,符合条件将通过检查
# ADDRESS_CHECK_REGEX = "^(?!.*admin).*"
# address name 替换非法符号的正则表达式, 不在其中的符号将被替换,如果不设置,默认为 [^a-z0-9], 需谨慎使用, 有些符号可能导致无法收件
# ADDRESS_REGEX = "[^a-z0-9]"
# MIN_ADDRESS_LEN = 1
# MAX_ADDRESS_LEN = 30
# 如果你想要你的网站私有,取消下面的注释,并修改密码
# PASSWORDS = ["123", "456"]
# admin 控制台密码, 不配置则不允许访问控制台
# ADMIN_PASSWORDS = ["123", "456"]
# 警告: 管理员控制台没有密码或用户检查
# DISABLE_ADMIN_PASSWORD_CHECK = false
# admin 联系方式,不配置则不显示,可配置任意字符串
# ADMIN_CONTACT = "[email protected]"
# DEFAULT_DOMAINS = ["xxx.xxx1" , "xxx.xxx2"] # 默认用户可用的域名(未登录或未分配角色的用户)
DOMAINS = ["xxx.xxx1" , "xxx.xxx2"] # 你的域名, 支持多个域名
# 对于中文域名,可以使用 DOMAIN_LABELS 显示域名的中文展示名称
# DOMAIN_LABELS = ["中文.xxx", "xxx.xxx2"]
# 新用户默认角色, 仅在启用邮件验证时有效
# USER_DEFAULT_ROLE = "vip"
# admin 角色配置, 如果用户角色等于 ADMIN_USER_ROLE 则可以访问 admin 控制台
# ADMIN_USER_ROLE = "admin" # the role which can access admin panel
# 用户角色配置, 如果 domains 为空将使用 default_domains
# 如果 prefix 为 null 将使用默认前缀, 如果 prefix 为空字符串将不使用前缀
# USER_ROLES = [
#    { domains = ["xxx.xxx1" , "xxx.xxx2"], role = "vip", prefix = "vip" },
#    { domains = ["xxx.xxx1" , "xxx.xxx2"], role = "admin", prefix = "" },
# ]
JWT_SECRET = "xxx" # 用于生成 jwt 的密钥, jwt 用于给用户登录以及鉴权
BLACK_LIST = "" # 黑名单,用于过滤发件人,逗号分隔
# 是否允许用户创建邮件, 不配置则不允许
ENABLE_USER_CREATE_EMAIL = true
# 允许用户删除邮件, 不配置则不允许
ENABLE_USER_DELETE_EMAIL = true
# 允许自动回复邮件
ENABLE_AUTO_REPLY = false
# 是否启用 webhook
# ENABLE_WEBHOOK = true
# 前端界面页脚文本
# COPYRIGHT = "Dream Hunter"
# DISABLE_SHOW_GITHUB = true # 是否显示 GitHub 链接
# 默认发送邮件余额,如果不设置,将为 0
# DEFAULT_SEND_BALANCE = 1
# NO_LIMIT_SEND_ROLE = "vip" # 可以无限发送邮件的角色
# Turnstile 人机验证配置
# CF_TURNSTILE_SITE_KEY = ""
# CF_TURNSTILE_SECRET_KEY = ""
# telegram bot 最多绑定邮箱数量
# TG_MAX_ADDRESS = 5
# telegram BOT_INFO,预定义的 BOT_INFO 可以降低 webhook 的延迟
# TG_BOT_INFO = "{}"
# 全局转发地址列表,如果不配置则不启用,启用后所有邮件都会转发到列表中的地址
# FORWARD_ADDRESS_LIST = ["[email protected]"]
# 前端地址,用于发送 webhook 的邮件 url
# FRONTEND_URL = "https://xxxx.xxx"
# 是否启用垃圾邮件检查
# ENABLE_CHECK_JUNK_MAIL = false

# D1 数据库的名称和 ID 可以在 cloudflare 控制台查看
[[d1_databases]]
binding = "DB"
database_name = "xxx" # D1 数据库名称
database_id = "xxx" # D1 数据库 ID

# kv config 用于用户注册发送邮件验证码,如果不启用用户注册或不启用注册验证,可以不配置
# [[kv_namespaces]]
# binding = "KV"
# id = "xxxx"

# 新建地址限流配置 /api/new_address
# [[unsafe.bindings]]
# name = "RATE_LIMITER"
# type = "ratelimit"
# namespace_id = "1001"
# # 10 requests per minute
# simple = { limit = 10, period = 60 }
我的配置:
name = "temp-email-api"
main = "src/worker.ts"
compatibility_date = "2024-09-23"
compatibility_flags = [ "nodejs_compat" ]
# if you want use custom_domain, you need to add routes
# routes = [
#  { pattern = "temp-email-api.xxxxx.xyz", custom_domain = true },
# ]

# enable cron if you want set auto clean up
# [triggers]
# crons = [ "0 0 * * *" ]

send_email = [
   { name = "SEND_MAIL" },
]

[vars]
TITLE = "cf-email-rzl" # custom title
ANNOUNCEMENT = "##built by rzl##"
PREFIX = "rzl"
# address check REGEX, if not set, will not check
# ADDRESS_CHECK_REGEX = "^(?!.*admin).*"
# address name replace REGEX, if not set, the default is [^a-z0-9]
# ADDRESS_REGEX = "[^a-z0-9]"
# (min, max) length of the adderss, if not set, the default is (1, 30)
# MIN_ADDRESS_LEN = 1
# MAX_ADDRESS_LEN = 30
# IF YOU WANT TO MAKE YOUR SITE PRIVATE, UNCOMMENT THE FOLLOWING LINES
PASSWORDS = [""]
# For admin panel
ADMIN_PASSWORDS = [""]
# warning: no password or user check for admin portal
# DISABLE_ADMIN_PASSWORD_CHECK = false
# ADMIN CONTACT, CAN BE ANY STRING
ADMIN_CONTACT = "[email protected]"
DEFAULT_DOMAINS = [""] # domain name for no role users
DOMAINS = ["" , "" , ""]
# For chinese domain name, you can use DOMAIN_LABELS to show chinese domain name
# DOMAIN_LABELS = ["中文.xxx", "xxx.xxx2"]
USER_DEFAULT_ROLE = "guest" # default role for new users(only when enable mail verification)
ADMIN_USER_ROLE = "admin" # the role which can access admin panel
# User roles configuration, if domains is empty will use default_domains, if prefix is null will use default prefix, if prefix is empty string will not use prefix
USER_ROLES = [
   { domains = [""], role = "guest", prefix = "guest" },
   { domains = ["" , "" , ""], role = "vip", prefix = "vip" },
   { domains = ["" , "" , ""], role = "admin", prefix = "" },
]
JWT_SECRET = "NN73yJ-------------------t5Dd"
BLACK_LIST = ""
# Allow users to create email addresses
ENABLE_USER_CREATE_EMAIL = true
# Allow users to delete messages
ENABLE_USER_DELETE_EMAIL = true
# Allow automatic replies to emails
ENABLE_AUTO_REPLY = false
# Allow webhook
# ENABLE_WEBHOOK = true
# Footer text
COPYRIGHT = "Rmail"
# DISABLE_SHOW_GITHUB = true
# default send balance, if not set, it will be 0
# DEFAULT_SEND_BALANCE = 1
# NO_LIMIT_SEND_ROLE = "vip" # the role which can send emails without limit
# Turnstile verification
# CF_TURNSTILE_SITE_KEY = ""
# CF_TURNSTILE_SECRET_KEY = ""
# telegram bot
# TG_MAX_ADDRESS = 5
# telegram bot info, predefined bot info can reduce latency of the webhook
# TG_BOT_INFO = "{}"
# global forward address list, if set, all emails will be forwarded to these addresses
# FORWARD_ADDRESS_LIST = ["[email protected]"]
# Frontend URL
# FRONTEND_URL = "https://xxxx.xxx"
# Enable check junk mail
# ENABLE_CHECK_JUNK_MAIL = false

[[d1_databases]]
binding = "DB"
database_name = "dev"
database_id = "3529d----------------------bb80acc1"

# kv config for send email verification code
[[kv_namespaces]]
binding = "KV"
id = "7498d--------------------------9e38d1b4"

# ratelimit config for /api/new_address
# [[unsafe.bindings]]
# name = "RATE_LIMITER"
# type = "ratelimit"
# namespace_id = "1001"
# # 10 requests per minute
# simple = { limit = 10, period = 60 }
Telegram Bot 配置
C:\Users\ro264\cloudflare_temp_email\worker>pnpm wrangler secret put TELEGRAM_BOT_TOKEN

 ⛅️ wrangler 3.85.0 (update available 3.87.0)
-------------------------------------------------------

√ Enter a secret value: ... **********************************************
🌀 Creating the secret for the Worker "cloudflare_temp_email"
√ There doesn't seem to be a Worker called "cloudflare_temp_email". Do you want to create a new Worker with that name and add secrets to it? ... yes
🌀 Creating new Worker "cloudflare_temp_email"...
✨ Success! Uploaded secret TELEGRAM_BOT_TOKEN
部署
C:\Users\ro264\cloudflare_temp_email\worker>pnpm run deploy

> [email protected] deploy C:\Users\ro264\cloudflare_temp_email\worker
> wrangler deploy --minify


 ⛅️ wrangler 3.85.0 (update available 3.87.0)
-------------------------------------------------------

Total Upload: 1341.57 KiB / gzip: 384.80 KiB
Worker Startup Time: 73 ms
Your worker has access to the following bindings:
- KV Namespaces:
  - KV: 7498d4--------------------------38d1b4
- D1 Databases:
  - DB: dev (3529d--------------------------b80acc1)
- Vars:
  - TITLE: "cf-email-rzl"
  - ANNOUNCEMENT: "##built by rzl##"
  - PREFIX: "rzl"
  - ADMIN_PASSWORDS: [
 "----------------"
]
  - ADMIN_CONTACT: "[email protected]"
  - DOMAINS: [
 "-------------",
 "---------------",
 "--------------"
]
  - USER_DEFAULT_ROLE: "guest"
  - ADMIN_USER_ROLE: "admin"
  - USER_ROLES: [
 {
  "domains": [
   "----------------"
  ],
  "role": "guest",
  "prefix": "guest"
 },
 {
  "domains": [
   "-----------------",
   "---------------",
   "----------------"
  ],
  "role": "vip",
  "prefix": "vip"
 },
 {
  "domains": [
   "---------------",
   "---------------",
   "---------------"
  ],
  "role": "admin",
  "prefix": "admin"
 }
]
  - JWT_SECRET: "NN7--------------------DDBPTt5Dd"
  - BLACK_LIST: ""
  - ENABLE_USER_CREATE_EMAIL: true
  - ENABLE_USER_DELETE_EMAIL: true
  - ENABLE_AUTO_REPLY: false
  - COPYRIGHT: "Rmail"
Uploaded temp-email-api (18.87 sec)
Deployed temp-email-api triggers (1.34 sec)
  https://temp-email-api.rzlrong.workers.dev
Current Version ID: 036d--------------------------5d2148
成功:
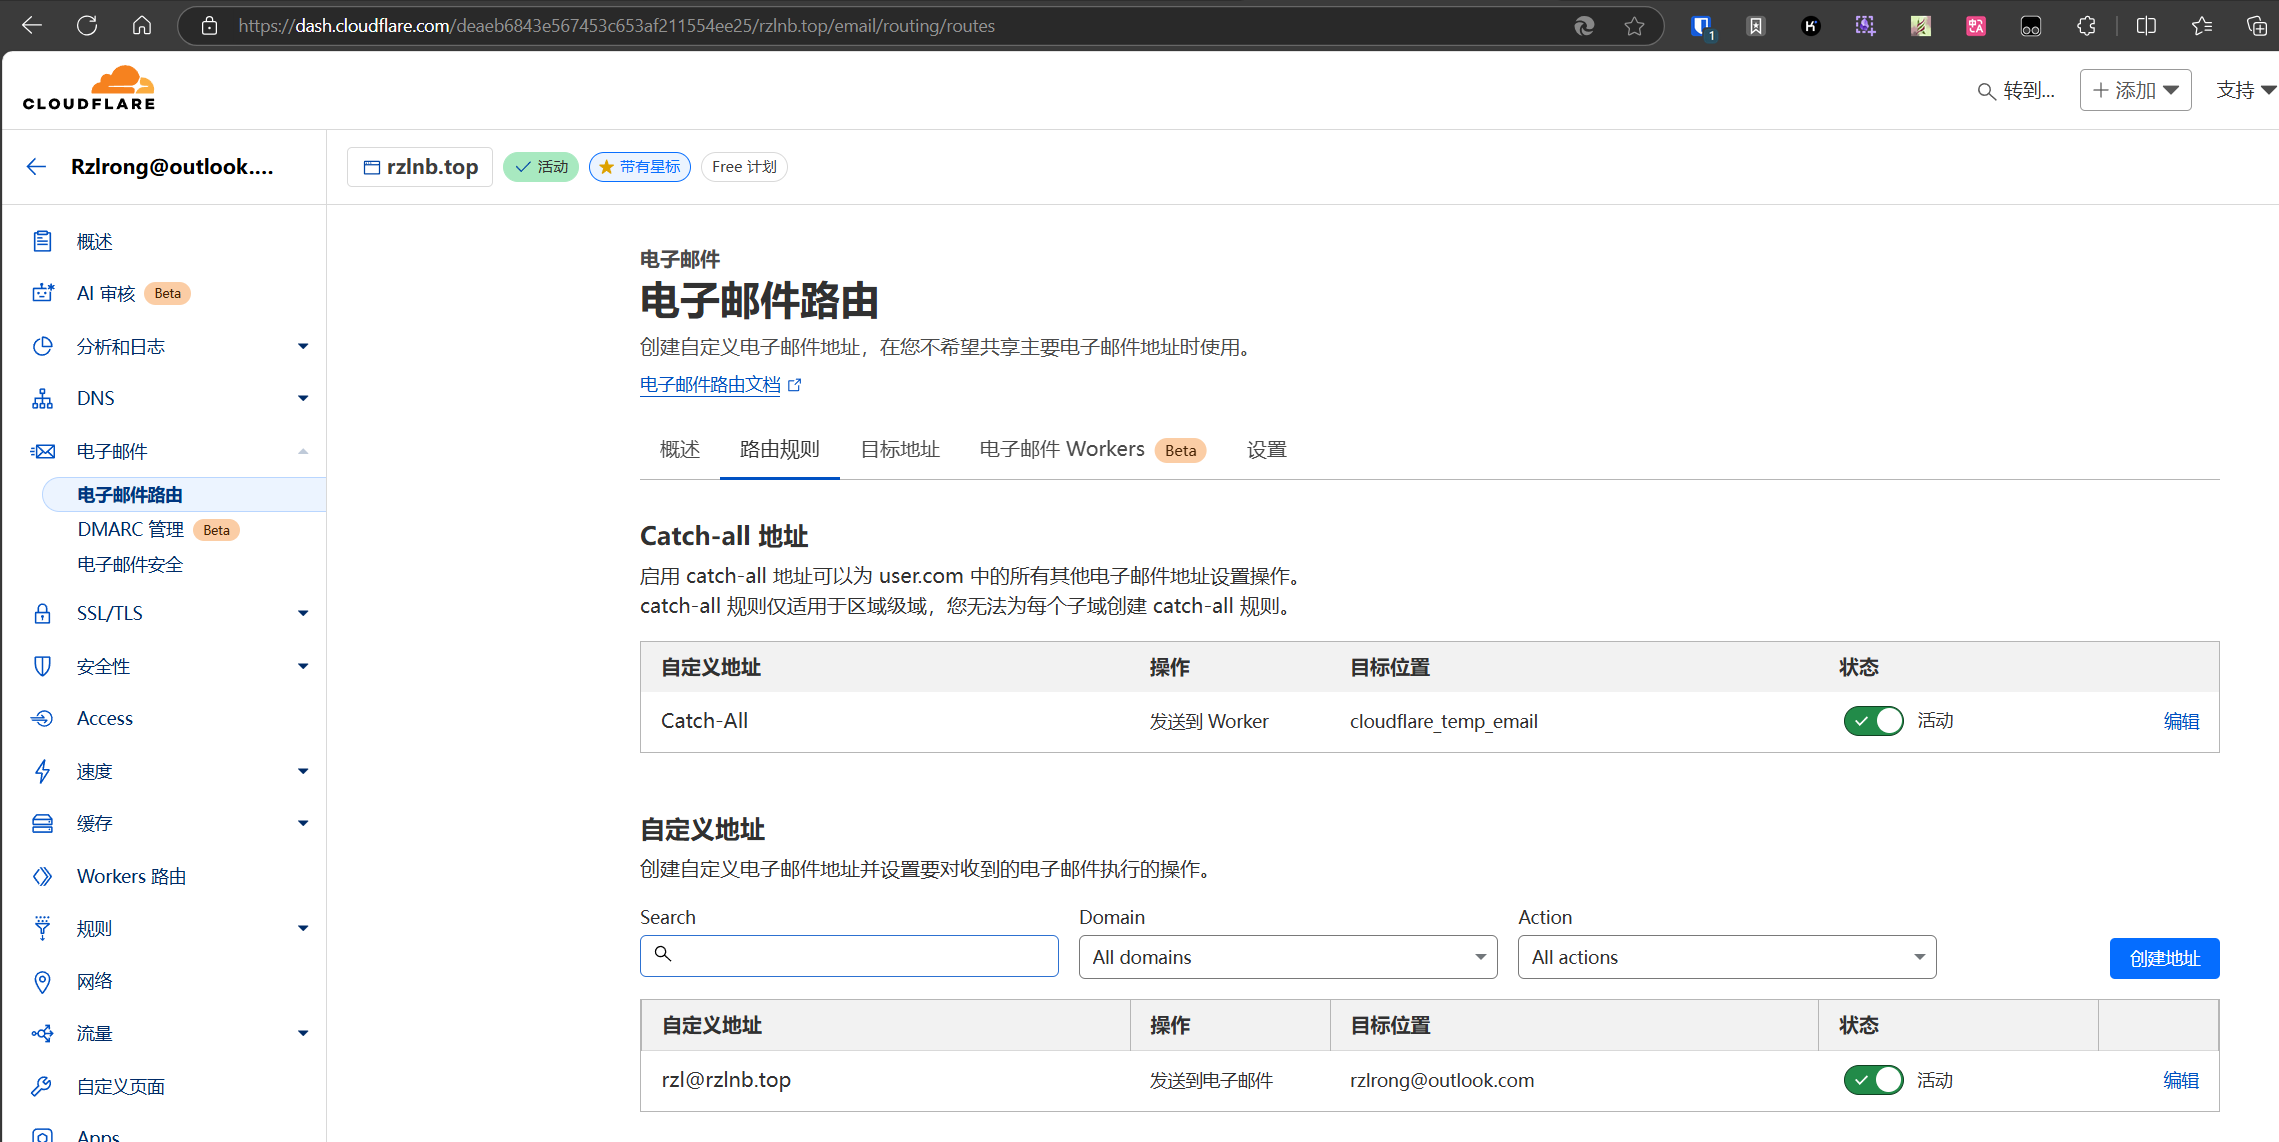
配置邮件转发
Cloudflare Pages 前端
- 点击
Workers & Pages->Overview->Create Application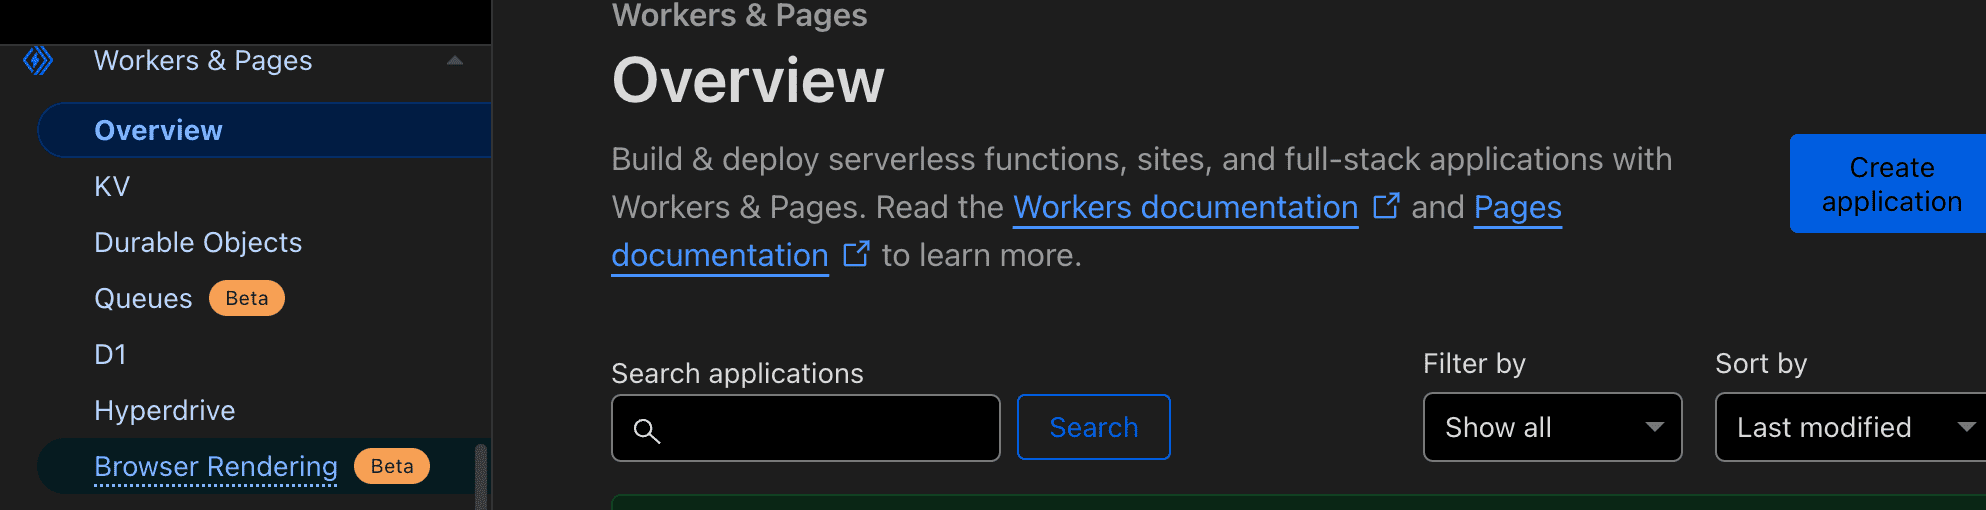
- 选择
Pages,选择Create using direct upload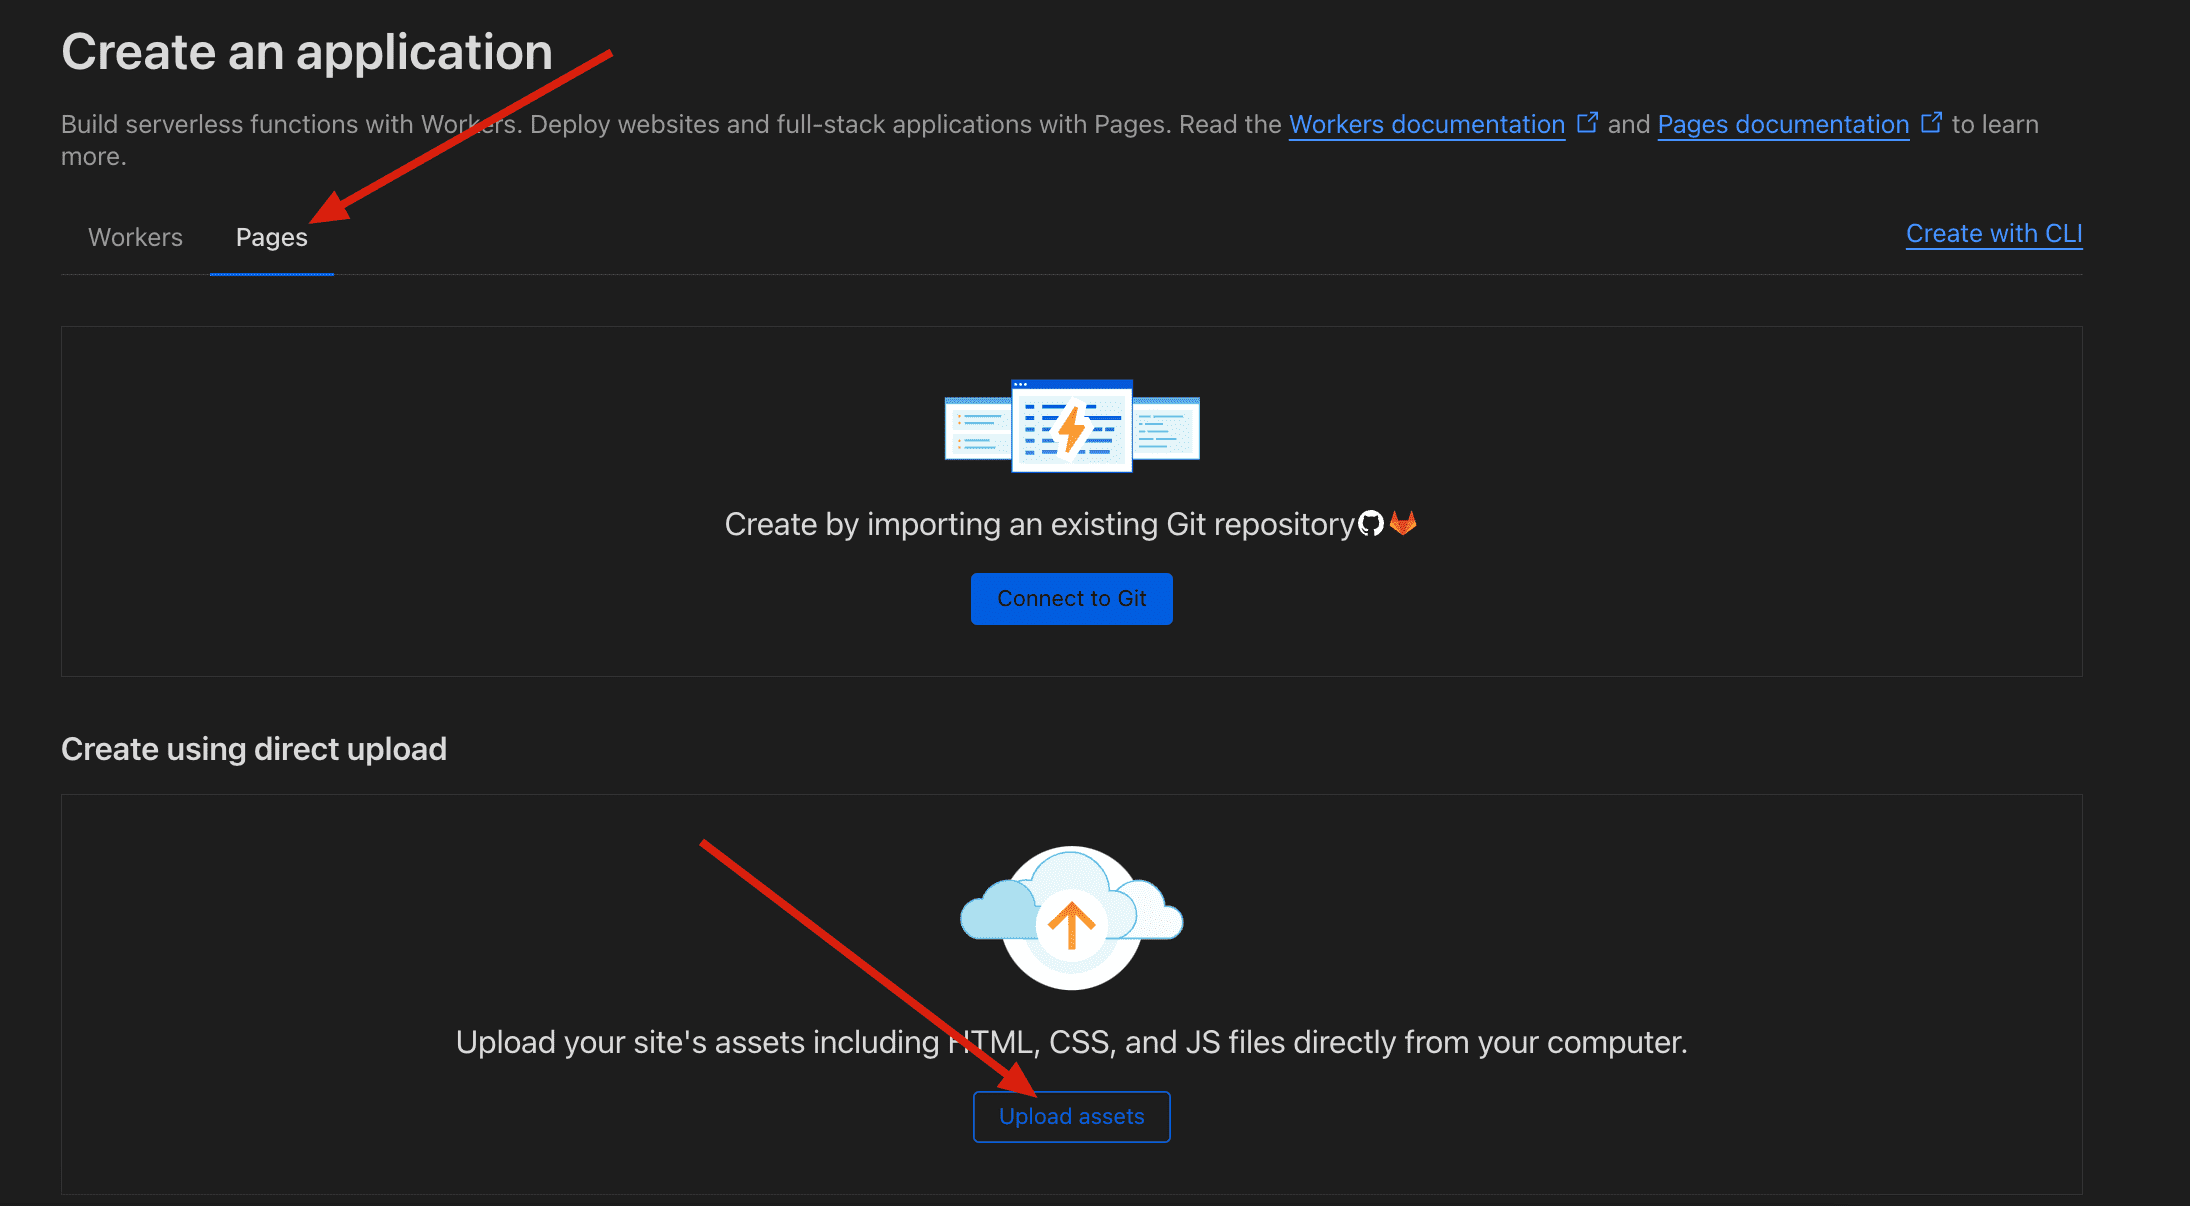
- 输入部署的 worker 的地址, 地址不要带
/,点击生成,成功会出现下载按钮,你会得到一个 zip 包- 此处 worker 域名为后端 api 的域名,比如我部署在
https://temp-email-api.awsl.uk,则填写https://temp-email-api.awsl.uk - 如果你的域名是
https://temp-email-api.xxx.workers.dev,则填写https://temp-email-api.xxx.workers.dev
- 此处 worker 域名为后端 api 的域名,比如我部署在
NOTE
你也可以手动部署,从这里下载 zip, frontend.zip
修改压缩包里面的 index-xxx.js 文件 ,xx 是随机的字符串
搜索 https://temp-email-api.xxx.xxx ,替换成你worker 的域名,然后部署新的zip文件
4. 选择 Pages ,点击 Create Pages , 修改名称,上传下载的 zip 包,然后点击 Deploy
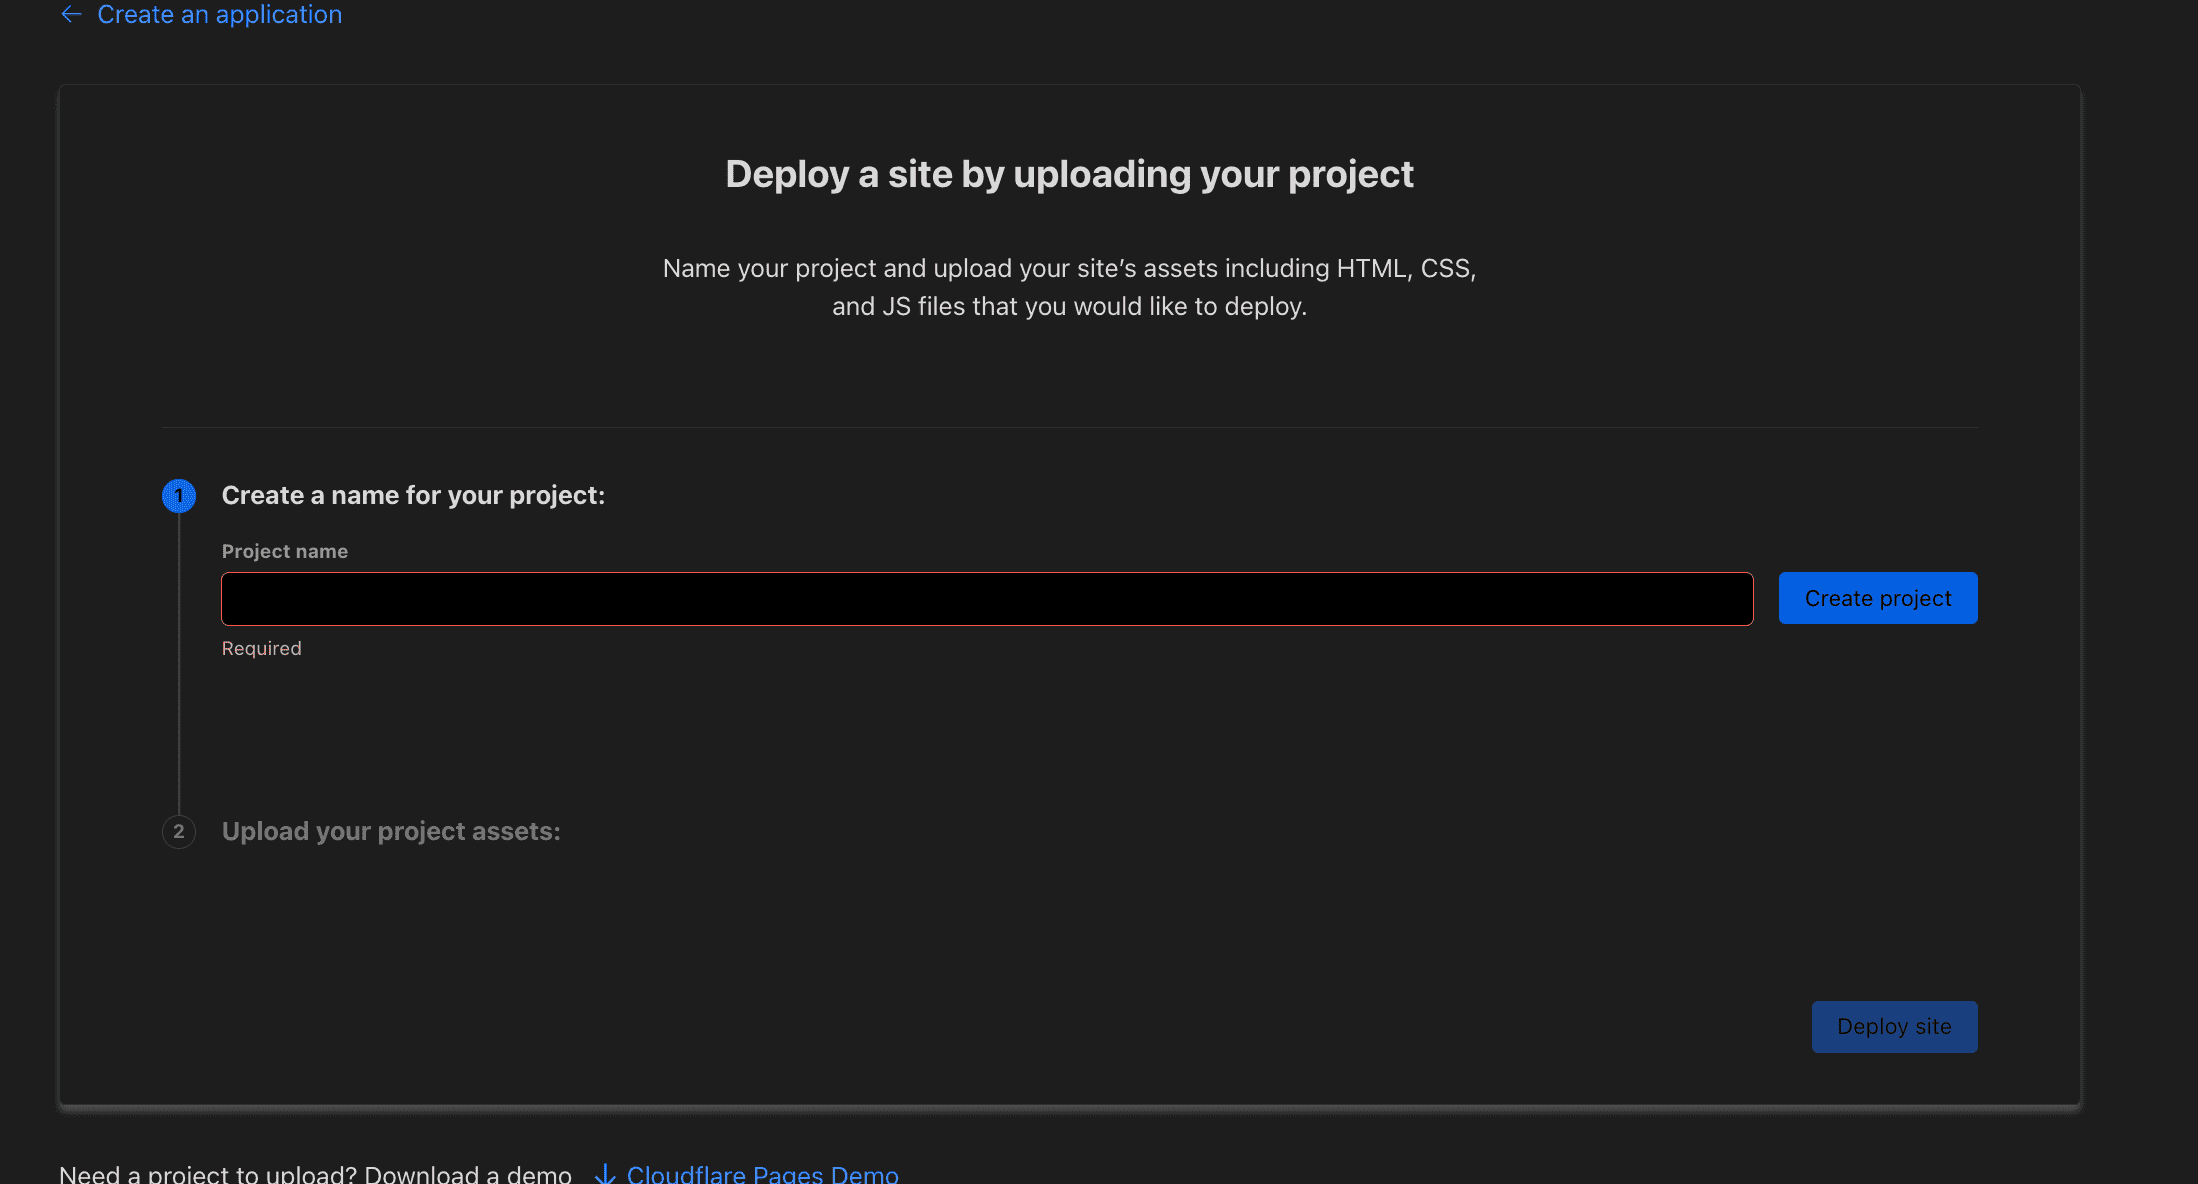 5. 打开 刚刚部署的
 Pages ,点击 Custom Domain 这里可以添加自己的域名,你也可以使用自动生成的 *.pages.dev 的域名。能打开域名说明部署成功。
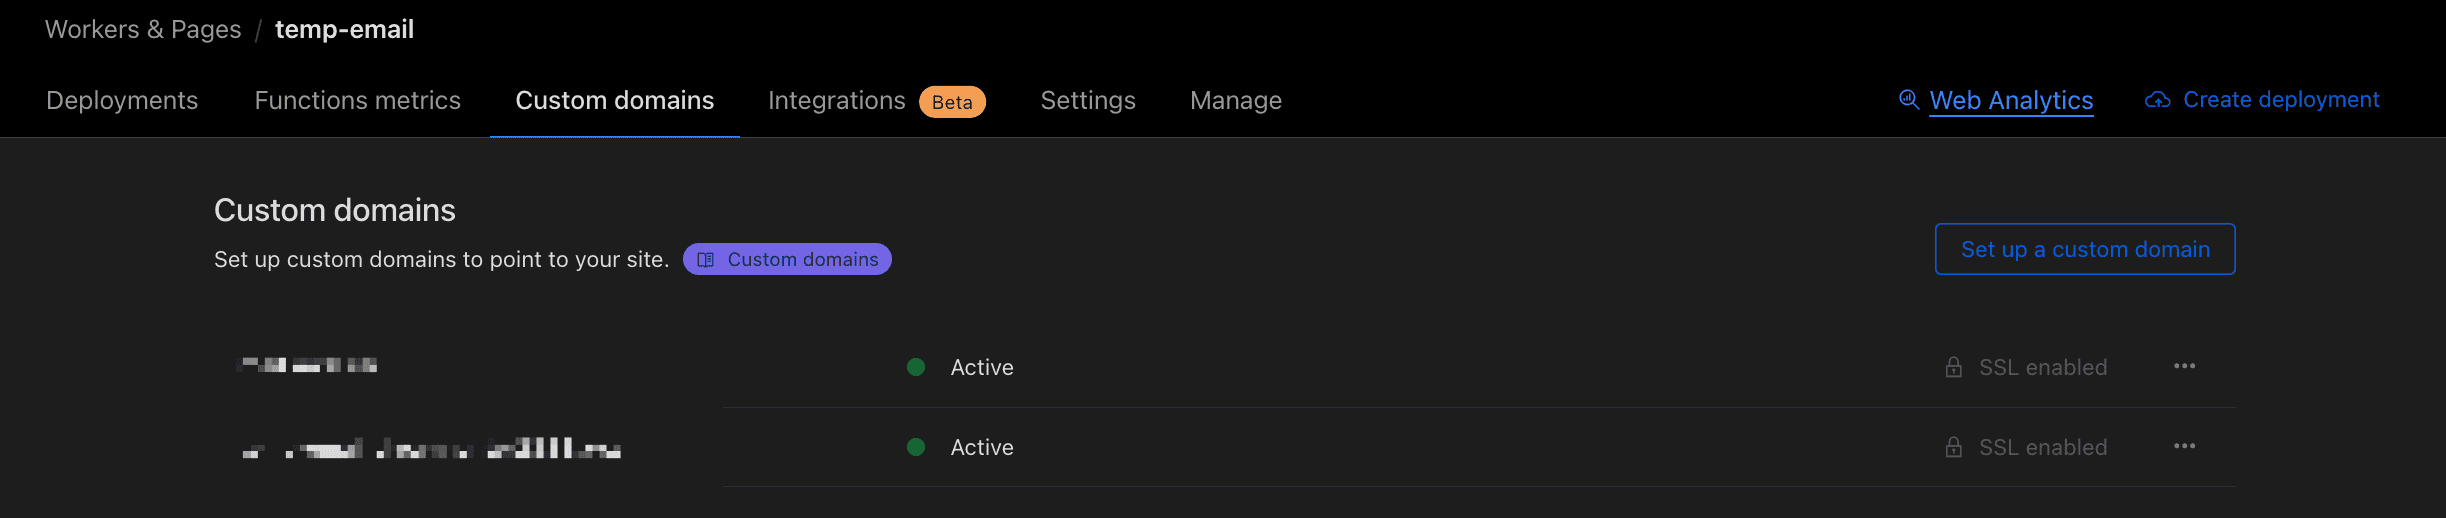
貌似cloudflare的一部分pages和workers的域名在国内都访问不了了,最好还是自定义一下域名